![]() Error Regarding the Protective Material Is Displayed
Error Regarding the Protective Material Is Displayed
![]() Error Regarding Automatic Duplex Printing Is Displayed
Error Regarding Automatic Duplex Printing Is Displayed
![]() Error Regarding Automatic Print Head Alignment Is Displayed
Error Regarding Automatic Print Head Alignment Is Displayed
![]() Errors About Disc Label Printing Are Displayed
Errors About Disc Label Printing Are Displayed
![]() Error Regarding the Power Cord Being Unplugged Is Displayed
Error Regarding the Power Cord Being Unplugged Is Displayed
![]() Writing Error/Output Error/Communication Error
Writing Error/Output Error/Communication Error
![]() The Inkjet Printer/Scanner/Fax Extended Survey Program Screen Is Displayed
The Inkjet Printer/Scanner/Fax Extended Survey Program Screen Is Displayed
![]() To Canon Solution Menu EX Users Screen Is Displayed
To Canon Solution Menu EX Users Screen Is Displayed
Error Number: B200 A printer error has occurred. Turn the printer off and unplug the power cord of the printer from the power supply. Then contact the service center. Is Displayed
Turn off the machine, and unplug the power cord of the machine from the power supply.
Contact the service center.
Error Number: **** A printer error has occurred. Turn the printer off and then on again. If this doesn't clear the error, see the user's guide for more detail. Is Displayed
"****" is displayed in the alphanumeric character and depends on the error occurred.
-
5100 Is Displayed
Confirm the movement of the print head holder blocked.
Cancel printing from your computer and turn off the machine. Then clear the jammed paper or protective material that is preventing the print head holder from moving, and turn on the machine again.
 Important
-
Be careful not to touch the components inside the machine. The machine may not print out properly if you touch it.
-
If the problem is not resolved, contact the service center.
-
-
6000 Is Displayed
If any object is placed in front of the machine, remove it.
Open the paper output tray gently, then turn the power off and back on.
-
Four-Digit Alphanumeric and "Printer error has occurred." Is Displayed
Turn off the machine, and unplug the power cord of the machine from the power supply.
Plug the machine back in and turn the machine back on.
If the problem is not resolved, contact the service center.
Error Regarding the Protective Material Is Displayed
-
Check: See Remove the protective material if it is attached to the holder and turn off power and back on. in An Error Message Is Displayed on the LCD and take the appropriate action.
Error Regarding Automatic Duplex Printing Is Displayed
-
Check: See Cannot Print Properly with Automatic Duplex Printing and take the appropriate action.
Error Regarding Automatic Print Head Alignment Is Displayed
-
Check: See Auto head align has failed. in An Error Message Is Displayed on the LCD and take the appropriate action.
Errors About Disc Label Printing Are Displayed
-
Check 1: Make sure that the inner cover (the cover of the disc tray) is open or closed.
Open or close the inner cover according to the message on the computer screen.
Do not open or close the inner cover while printing is in progress. This may damage the machine.
-
Check 2: Is the disc tray placed properly?
Open the inner cover, properly place the disc tray again, then press the OK button on the machine to dismiss the error.
Make sure that you are using the disc tray supplied with the machine ("G" is on the upper side).
For details on how to place the disc tray, refer to Placing a Printable Disc.
-
Check 3: Is the printable disc placed on the disc tray?
Properly place the printable disc on the disc tray, attach the disc tray again, then press the OK button on the machine to dismiss the error.
Make sure that you are using the disc tray supplied with the machine ("G" is on the upper side).
For details on how to place the disc tray, refer to Placing a Printable Disc.
-
Check 4: Unrecognizable printable disc may be placed.
Canon recommends that you use printable discs specially processed to be printed on by an inkjet printer.
-
Check 5: Is the printable disc on the disc tray already printed?
If you place a printable disc on which has already been printed on the disc tray, the disc tray may be ejected.
In this case, try printing again after clearing the Detects a printable disc in the disc tray check box in Custom Settings on the Maintenance tab in the printer driver and clicking OK.
When printing is over, select the Detects a printable disc in the disc tray check box and click OK.
 Note
Note-
If the Detects a printable disc in the disc tray check box is cleared, printing may start without the printable disc loaded. Selecting the check box prevents the disc tray from getting dirty.
-
Error Regarding the Power Cord Being Unplugged Is Displayed
The power cord may have been unplugged while the machine was still on.
Check the error message that appears on the computer, then click OK.
The machine starts printing.
See Notice for Unplugging the Power Cord for unplugging the power cord.
Writing Error/Output Error/Communication Error
-
Check 1: If the POWER lamp is off, make sure that the power plug is plugged in, then turn the machine on.
While the POWER lamp is flashing blue, the machine is initializing. Wait until the POWER lamp stops flashing and remains lit blue.
-
Check 2: Make sure that the printer port is configured appropriately in the printer driver.
* In the following instructions, "XXX" signifies your machine's name.
-
Log on as a user account with administrator privilege.
-
Select items from the Start menu as shown below.
-
In Windows 7, select Devices and Printers from the Start menu.
-
In Windows Vista, select the Start menu > Control Panel > Hardware and Sound > Printers.
-
In Windows XP, select the Start menu > Control Panel > Printers and Other Hardware > Printers and Faxes.
-
-
Open the properties of printer driver for the machine.
-
In Windows 7, right-click the "Canon XXX Printer" icon (where "XXX" is your machine's name), then select Printer properties.
-
In Windows Vista or Windows XP, right-click the "Canon XXX Printer" icon (where "XXX" is your machine's name), then select Properties.
-
-
Click the Ports tab to confirm the port settings.
Make sure that a port named "USBnnn" (where "n" is a number) with "Canon XXX Printer" appearing in the Printer column is selected for Print to the following port(s).
Note-
When the machine is used over LAN, the port name of the machine is displayed as "CNBJNP_xxxxxxxxxx". "xxxxxxxxxx" is the character string generated from the MAC address or a character string specified by the user when setting up the machine.
-
If the setting is incorrect:
Reinstall the MP Drivers.
-
Printing does not start even though the machine is connected to the computer using a USB cable and the port named "USBnnn" is selected:
Launch Canon My Printer from the task tray, select Diagnose and Repair Printer. Follow the on-screen instructions to set the correct printer port, then select your machine's name.
If the problem is not resolved, reinstall the MP Drivers.
-
Printing does not start even though the port named "CNBJNP_xxxxxxxxxx" is selected when the machine is used over LAN:
Launch IJ Network Tool, and select "CNBJNP_xxxxxxxxxx" as you confirmed in step 4, then associate the port with the printer using Associate Port in the Settings menu.
If the problem is not resolved, reinstall the MP Drivers.
-
-
-
Check 3: Make sure that the machine is connected to your computer properly.
When the machine is connected to your computer with a USB cable, make sure that the USB cable is securely plugged in to the machine and the computer, then check the followings:
-
If you are using a relay device such as a USB hub, disconnect it, connect the machine directly to the computer, and try printing again. If printing starts normally, there is a problem with the relay device. Consult the reseller of the relay device for details.
-
There could also be a problem with the USB cable. Replace the USB cable and try printing again.
When you use the machine over LAN, make sure that the machine is set up to be used over network correctly. For details, refer to your setup manual.
-
-
Check 4: Make sure that the MP Drivers are installed correctly.
Uninstall the MP Drivers following the procedure described in Deleting the Unnecessary MP Drivers, insert the Setup CD-ROM into the computer's disc drive and install the MP Drivers again.
-
Check 5: When the machine is connected to your computer with a USB cable, check the status of the device on your computer.
Follow the procedure below to check the status of the device.
-
Open the Device Manager on your computer as shown below.
If the User Account Control screen is displayed, follow the on-screen instructions.
-
In Windows 7 or Windows Vista, click Control Panel, Hardware and Sound, then Device Manager.
-
In Windows XP, click Control Panel, Performance and Maintenance, System, then click Device Manager on the Hardware sheet.
-
-
Double-click Universal Serial Bus controllers then USB Printing Support.
If the USB Printing Support Properties screen is not displayed, make sure that the machine is correctly connected to the computer.
 Check 3: Make sure that the machine is connected to your computer properly.
 -
Click the General tab and make sure that there is no indication of a problem with the device.
If a device error is displayed, refer to Windows help to resolve the error.
-
Other Error Messages
-
Check: If an error message is displayed outside the printer status monitor, check the following:
-
"Could not spool successfully due to insufficient disk space"
Delete any unnecessary files to increase the amount of free space on the disk.
-
"Could not spool successfully due to insufficient memory"
Quit other running application softwares to increase available memory.
If you cannot print yet, restart your computer and retry printing.
-
"Printer driver could not be found"
Uninstall the printer driver according to the procedure described in Deleting the Unnecessary MP Drivers, and then reinstall it.
-
"Could not print Application name - File name"
Try printing again once the current job is complete.
-
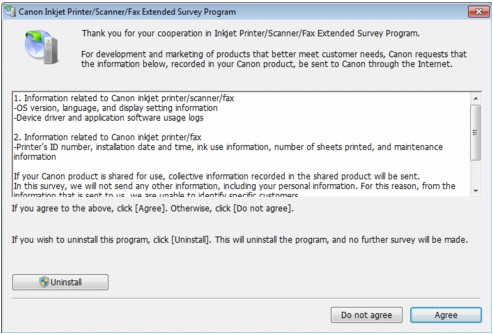
The Inkjet Printer/Scanner/Fax Extended Survey Program Screen Is Displayed
If the Inkjet Printer/Scanner/Fax Extended Survey Program is installed, a confirmation screen asking for permission to send the printer and application software usage information will be displayed every month for about ten years.
Read the instructions on the screen and follow the procedure below.
-
If you agree to participate in the survey program:
Click Agree, then follow the on-screen instructions. The printer usage information will be sent via the Internet. If you have followed the on-screen instructions, the information will be sent automatically from the second time onward and the confirmation screen will not be displayed again.
Note-
When the information is being sent, a caution screen such as an Internet security screen may be displayed. In this case, confirm that the program name is "IJPLMUI.exe", then allow it.
-
If you deselect the Send automatically from the next time check box, the information will not be sent automatically from the second time onward and a confirmation screen will be displayed at the time of the next survey. To send the information automatically, see Changing the confirmation screen setting:.
-
-
If you do not agree to participate in the survey program:
Click Do not agree. The confirmation screen will be closed, and the survey at that time is skipped. The confirmation screen will be displayed again one month later.
-
To uninstall the Inkjet Printer/Scanner/Fax Extended Survey Program:
To uninstall the Inkjet Printer/Scanner/Fax Extended Survey Program, click Uninstall, then follow the on-screen instructions.
-
Changing the confirmation screen setting:
-
Select items from the Start menu as shown below.
-
In Windows 7 or Windows Vista, select the Start menu > Control Panel > Uninstall a program.
-
In Windows XP, select the Start menu > Control Panel > Add or Remove Programs.
Note-
In Windows 7 or Windows Vista, a confirmation/warning dialog box may appear when installing, uninstalling or starting up software.
This dialog box appears when administrative rights are required to perform a task.
If you are logged on to an administrator account, follow the on-screen instructions.
-
-
-
Select Canon Inkjet Printer/Scanner/Fax Extended Survey Program.
-
Select Change.
If you select Yes after you have followed the on-screen instructions, the confirmation screen will be displayed at the time of the next survey.
If you select No, the information will be sent automatically.
Note-
If you select Uninstall (or Remove in Windows XP), the Inkjet Printer/Scanner/Fax Extended Survey Program is uninstalled. Follow the on-screen instructions.
-
-
To Canon Solution Menu EX Users Screen Is Displayed
If Solution Menu EX is installed, you can download the updated version of application software or information using Solution Menu EX via the Internet.
The information of application software installed on your computer will be sent to Canon to confirm the updated version of application software or information.
Before sending the information, the following dialog box is displayed.
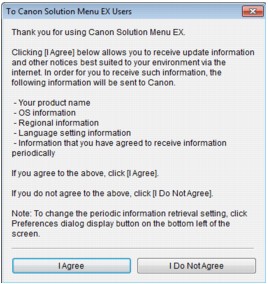
Read the instructions on the screen, then click I Agree to agree to send the information or click I Do Not Agree to disagree to send it.
Note-
If you click the
 button on Solution Menu EX and select the Use the Notices/Updates function check box on the Preferences dialog box, information will be sent.
If you deselect the Use the Notices/Updates function check box, information will not be sent.
