
Use ScanGear (scanner driver) to make image corrections and color adjustments when scanning. ScanGear can be started from MP Navigator EX or an application.
 Note
NoteTo scan via a network connection, start MP Navigator EX and set up the network environment.
Follow these steps to start ScanGear from the Navigation Mode screen of MP Navigator EX.
Start MP Navigator EX and open the Navigation Mode screen.
In Scan/Import, click Photos/Documents (Platen).
The Scan/Import window opens.
Select the Use the scanner driver checkbox, then click Open Scanner Driver.
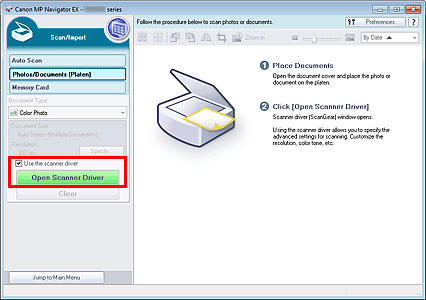
The ScanGear screen appears.
Follow these steps to start ScanGear from the One-click Mode screen of MP Navigator EX.
Start MP Navigator EX and open the One-click Mode screen.
Click the corresponding icon.
The corresponding dialog box opens.
Select the Use the scanner driver checkbox in Scan Settings, then click Scan.
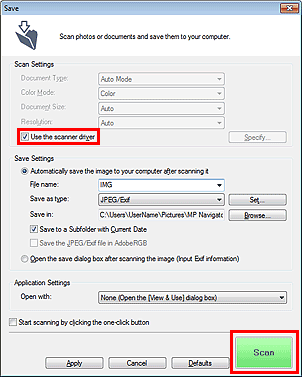
The ScanGear screen appears.
 Important
Use the scanner driver is not displayed in the Auto Scan dialog box or PDF dialog box.
Follow these steps (example) to start ScanGear from an application.
The procedure varies depending on the application. For details, refer to the application's manual.
Start the application.
On the menu of the application, select the machine.
NoteFor network connection, "Network" is displayed after the product name.
Select the command to scan a document.
The ScanGear screen appears.
