
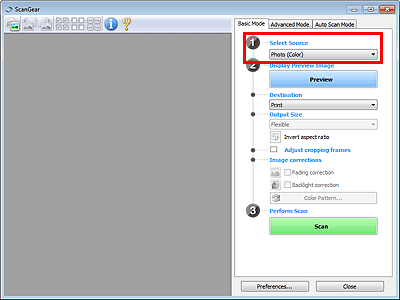
Use the Basic Mode tab to scan easily by following the on-screen steps.
See "Scanning Multiple Documents at One Time with ScanGear (Scanner Driver)" to scan multiple documents at one time.
 Important
The following types of documents may not be cropped correctly. In that case, click  (Thumbnail) on the Toolbar to switch to whole image view and scan.
- Photos that have a whitish border
- Documents printed on white paper, hand-written text, business cards, etc.
- Thin documents
- Thick documents
The following types of documents cannot be cropped correctly.
- Documents smaller than 1.2 inches (3 cm) square
- Photos that have been cut to various shapes
Place the document on the Platen, then start ScanGear (scanner driver).
Set Select Source according to the document placed on the Platen.
 Note
NoteTo scan magazines containing many color photos, select Magazine (Color).
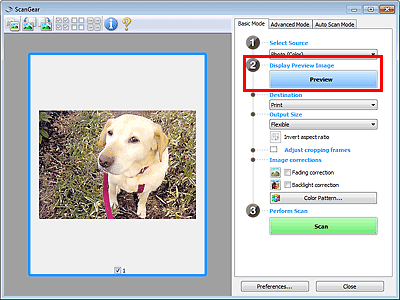
Click Preview.
Preview image appears in the Preview area.
 Note
NoteColors are adjusted based on the document type selected in Select Source.
Set Destination.
Set Output Size.
Output size options vary by the item selected in Destination.
Adjust the cropping frames (scan areas) as required.
Adjust the size and position of the cropping frames on the preview image.
Set Image corrections as required.
Click Scan.
Starts scanning.
NoteClick  (Information) to open a dialog box in which you can check the current scan settings (document type, etc.).
A response of ScanGear after scanning can be specified in Status of ScanGear dialog after scanning on the Scan tab of the Preferences dialog box.

