
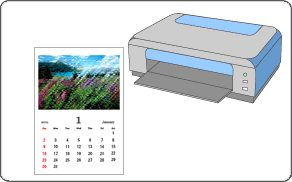
Use Easy-PhotoPrint EX to edit and print content downloaded from the Canon website.
 Important
Keep these points in mind when using PREMIUM Contents Print.
To print with Easy-PhotoPrint EX, you need to download and install the exclusive content.
Refer to "Downloading Premium Content" for details on how to download content.
You may only use the content downloaded or printed for personal purposes.
You may not use the content for commercial purposes.
From the Start menu, select All Programs > Canon Utilities > Solution Menu EX, then click Solution Menu EX.
Solution Menu EX starts.
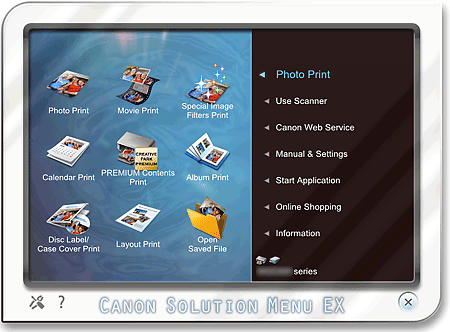
Select Photo Print, then click the PREMIUM Contents Print icon.
Easy-PhotoPrint EX starts and the Page Setup screen of PREMIUM Contents Print appears.
 Important
PREMIUM Contents Print is not displayed in Menu of Easy-PhotoPrint EX.
To print premium content, start Easy-PhotoPrint EX from Solution Menu EX following the steps above.
 Note
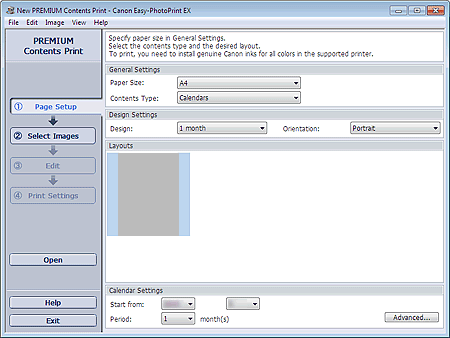
NoteIn the actual screen, layouts for the selected Contents Type are displayed instead of the gray area shown above.
Alternatively, select Canon Web Service of Solution Menu EX and click the PREMIUM Contents Print icon to start Easy-PhotoPrint EX.
Set Paper Size and Contents Type in the General Settings section of the Page Setup screen.
Select a layout from Layouts.
ImportantThe layout does not appear if the allowed number of print copies was exceeded or the usage period has elapsed.
Note (Cannot print) appears on the bottom right of the thumbnails (reduced images) of layouts that do not support the selected paper size. When you click such a thumbnail, a dialog box in which you can change the paper size appears.
Right-click a thumbnail and select Properties... from the displayed menu to check the allowed number of print copies, usage period, supported paper sizes, etc. of the selected layout.
Next, skip ahead to Step 7.
Set Design and Orientation in the Design Settings section.
Select a layout from Layouts.
ImportantThe layout does not appear if the allowed number of print copies was exceeded or the usage period has elapsed.
NoteThe layouts displayed vary depending on the Design and Orientation.
(Cannot print) appears on the bottom right of the thumbnails (reduced images) of layouts that do not support the selected paper size. When you click such a thumbnail, a dialog box in which you can change the paper size appears.
Right-click a thumbnail and select Properties... from the displayed menu to check the allowed number of print copies, usage period, supported paper sizes, etc. of the selected layout.
Set Start from and Period in the Calendar Settings section.
NoteYou can specify the display style of the days of the week in the Calendar Settings dialog box. To display the Calendar Settings dialog box, click Advanced....
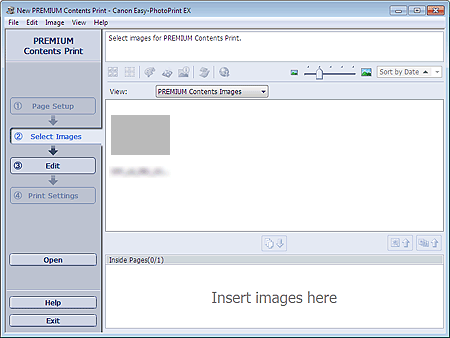
Click Select Images in the step button area on the left side of the screen.
The Select Images screen appears.
 Important
The Select Images screen does not appear depending on the selected content. In that case, skip ahead to Step 11.
NoteIn the actual screen, images are displayed instead of the gray area shown above.
Select PREMIUM Contents Images or Local Images for View.
NoteView does not appear depending on the selected content.
Select the folder that contains the image you want to print from the Folder Tree area.
The images in the folder will be displayed as thumbnails (miniatures).
NoteThe Folder Tree area is displayed only when Local Images are available.
You can also use still images captured from videos, depending on the selected content.
You can also use images downloaded from photo sharing sites on the Internet, depending on the selected content.
Select the image(s) you want to print and click  (Import to Inside Pages).
The selected image(s) is (are) displayed in the selected image area.
You can also select the image(s) you want to print by dragging it (them) into the selected image area.
NoteTo delete an image in the selected image area, select the image you want to delete and click  (Delete Imported Image).
To delete all images from the selected image area, click  (Delete All Imported Images).
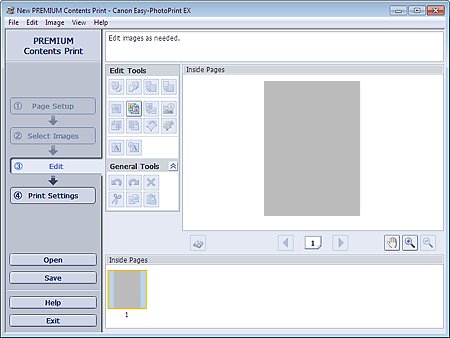
Click Edit in the step button area on the left side of the screen.
The Edit screen appears.
 Important
The Edit screen does not appear depending on the selected content. In that case, skip ahead to Step 13.
NoteIn the actual screen, the content you are creating is displayed instead of the gray areas shown above.
Edit the content if necessary.
ImportantThe edit information will be discarded if you exit Easy-PhotoPrint EX without saving the edited item. It is recommended that you save the item if you want to edit it again.
NoteAvailable editing functions vary depending on the selected content.
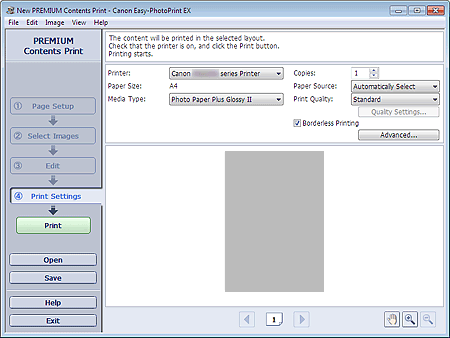
Click Print Settings in the step button area on the left side of the screen.
The Print Settings screen appears.
 Note
NoteIn the actual screen, the content you created is displayed instead of the gray area shown above.
Set Media Type, Paper Source, etc. according to the printer and paper to be used.
NoteThe media types displayed may vary depending on the selected content, printer and paper size.
The paper sources may vary depending on the printer and the media type.
You can set a custom print quality level in the Print Quality Settings dialog box. To display the Print Quality Settings dialog box, select Custom for Print Quality and click Quality Settings....
Select the Borderless Printing checkbox to print each page of the item on a full page without borders.
You can specify the print range and the amount of extension for borderless printing in the Print Settings dialog box. To display the Print Settings dialog box, click Advanced....
Click Print in the step button area on the left side of the screen.
NoteYou can correct or enhance the selected image before printing.
See Help for details on each screen.

