
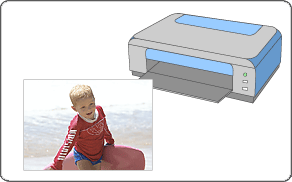
Easy-PhotoPrint EX allows you to print your favorite photos in a variety of layouts.
You can also create borderless photos easily.
Corrections suitable for photos can be applied automatically when printing.
Make sure that the machine is turned on.
Start Easy-PhotoPrint EX.
Click Photo Print from Menu.
The Select Images screen appears.

 Important
The thumbnails (reduced images) displayed in the screen may appear as follows:
- A black line appears along an edge of the image.
- An edge of the image appears cropped.
However, such images will be displayed normally when enlarged or previewed, and print results will not be affected.
Select the folder that contains the image you want to print from the Folder Tree area.
The images in the folder will be displayed as thumbnails (miniatures).
ImportantIf Easy-PhotoPrint EX is started from another application (MP Navigator EX, ZoomBrowser EX or Digital Photo Professional), the Folder Tree area will not be displayed.
The images selected in the application will be displayed as thumbnails.
 Note
NoteYou can also use still images captured from videos.
You can also use images downloaded from photo sharing sites on the Internet.
Click the image you want to print.
The number of copies appears as "1" below the clicked image, while the selected image itself will appear in the selected image area.
NoteTo delete an image in the selected image area, select the image you want to delete and click  (Delete Imported Image).
To delete all images from the selected image area, click  (Delete All Imported Images).
To print two or more copies of an image, click  (Up arrow) until the number of copies you want is reached. To reduce the number of copies shown in the box, click
  (Down arrow).
Click Select Paper in the step button area on the left side of the screen.
The Select Paper screen appears.
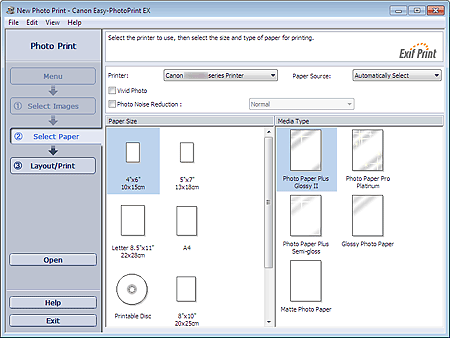
Set Paper Source, Paper Size, etc. according to the printer and paper to be used.
NoteThe paper sizes and media types may vary depending on the printer.
The paper sources may vary depending on the printer and the media type.
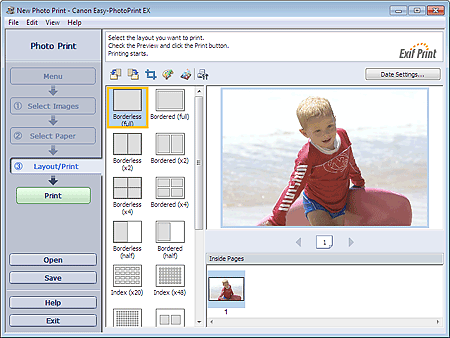
Click Layout/Print in the step button area on the left side of the screen.
The Layout/Print screen appears.
 Important
The thumbnails (reduced images) displayed in the screen may appear as follows:
- A black line appears along an edge of the image.
- An edge of the image appears cropped.
However, such images will be displayed normally when enlarged or previewed, and print results will not be affected.
Select a layout you want to use.
Click a borderless layout to print borderless photos.
NoteThe layouts that can be selected may vary depending on the printer, paper size, and media type.
Printing starts from the left side of the image displayed in the Layout/Print screen.
![]() Which Side of the Displayed Image Does the Printing Start from?
Which Side of the Displayed Image Does the Printing Start from?
Load paper.
Click Print in the step button area on the left side of the screen.
ImportantWhile printing high-resolution images, data may be printed only to the middle if many images are printed at one time. In such cases, select the Spool print job page by page checkbox in the Preferences dialog box, and then print again.
To display the Preferences dialog box, click  (Settings) or select Preferences... from the File menu.
The photo print settings will be discarded if you exit Easy-PhotoPrint EX without saving the settings. It is recommended that you save the printed image if you want to print it again.
When you print on a bordered layout, the margins on the left and right or the top and bottom may become wider than the other.
NoteSee Help for details on each screen.
You can correct or enhance the selected image before printing.
You can also boost the colors in a photo or select a layout from a variety of options before printing.
