
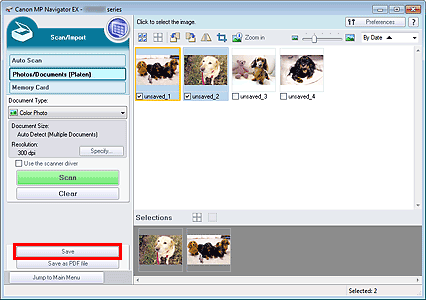
Save images scanned with MP Navigator EX to a computer.
Select the checkboxes of the images you want to save, then click Save.
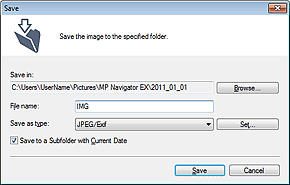
In the Save dialog box, specify the save settings.
Specify the destination folder, file name, and file type.
 Important
You cannot select JPEG/Exif when Document Type is Text(OCR).
You cannot select JPEG/Exif when Black and White is selected for Color Mode on the Advanced Mode tab of ScanGear (scanner driver).
 Note
NoteBy default, the scanned images are saved in the following folders.
Windows 7: MP Navigator EX folder in My Pictures folder
Windows Vista: MP Navigator EX folder in Pictures folder
Windows XP: MP Navigator EX folder in My Pictures folder
Click Save.
Scanned images are saved according to the settings.
To further use/edit the scanned images on MP Navigator EX, click Open saved location in the Save Complete dialog box.
![]() Correcting/Enhancing Images Automatically
Correcting/Enhancing Images Automatically
